Every Chair Has a Story
Every chair tells a story, but The Velvet Rebel doesn’t just whisper, it roars. What began as a worn, forgotten frame transformed into a fierce fusion of bold textures, rebellious flair, and unapologetic personality. In this behind-the-scenes look, I take you through every step of the journey – from stripping her down to her bones, to hand-selecting every decadent detail. This is more than a makeover – it’s a Revival. And The Velvet Rebel was born to stand out!

Sourcing with Soul
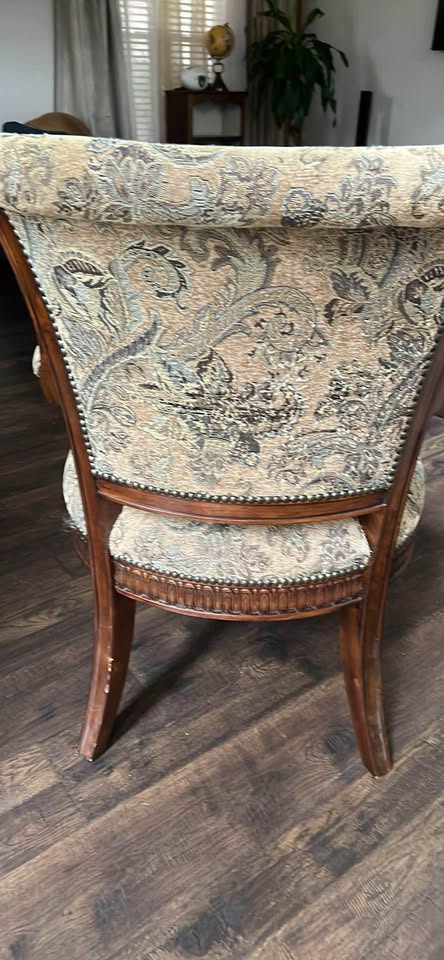
I source my pieces from various places, such as Facebook Marketplace, antique stores, thrift stores, and even Craigslist and estate sales. I love to find pieces with good bones that need some love and attention to bring them back to their former glory and to keep them from the landfill. Sometimes, I like to pick up a broken down piece so that I can repair what others may throw away. When I found The Velvet Rebel she stood out to me because of the intricately carved details on her twisty little frame. The moment I saw her, I had a vision of her as a fierce statement chair. I knew she could pull it off – so I grabbed her up. Below were the listing photos of her ‘Before’ condition. While hard to discern, there were stains on the seat, scrapes on her legs and fading of the material.


Stripped Down to Her Bones
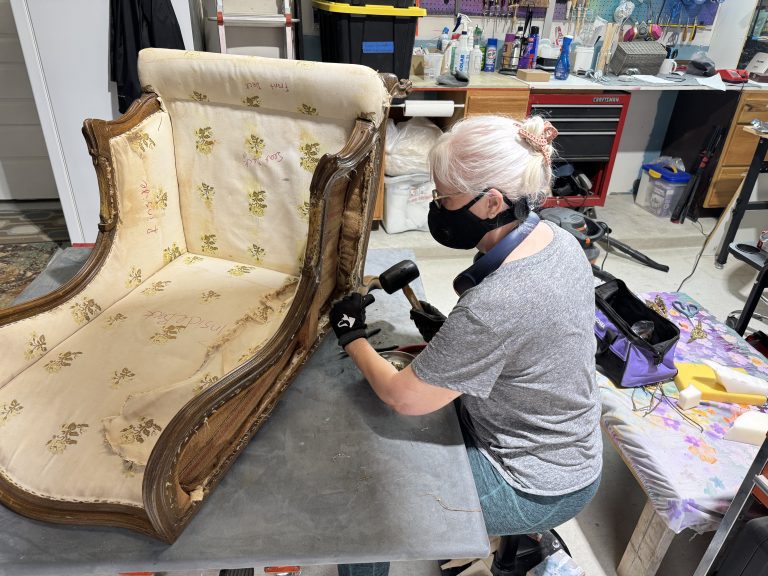
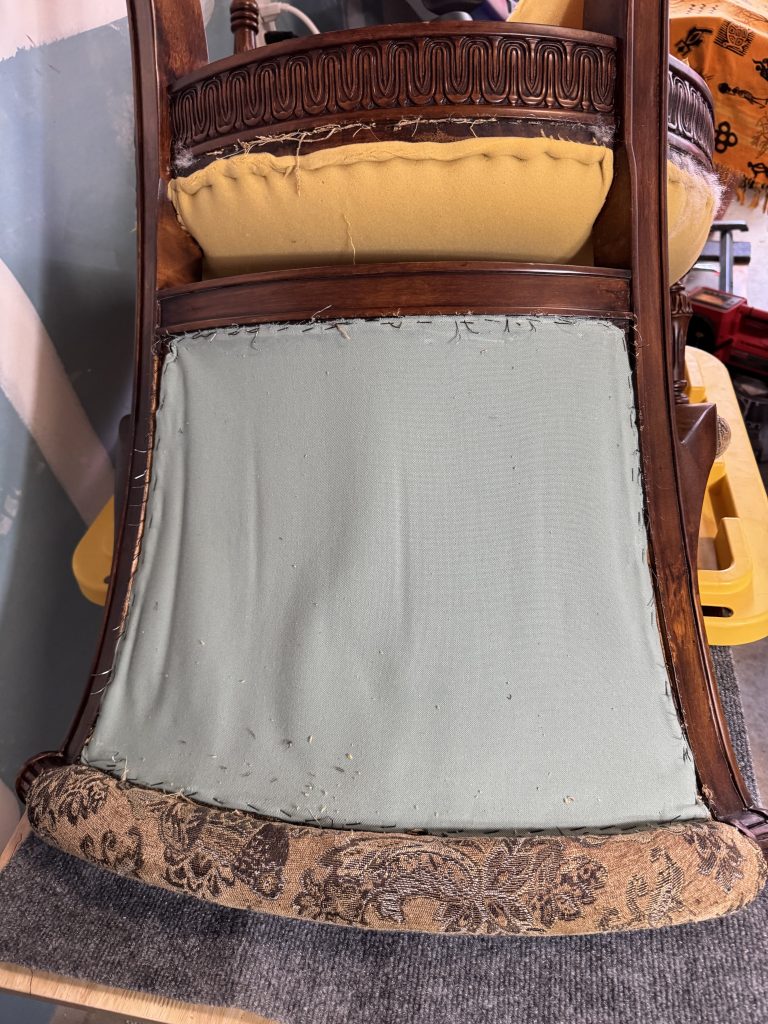
When I brought her home I commenced to stripping her down. As I work, I take many pictures along the way to reference how a chair was previously upholstered, any things that I may need to repair and I evaluate the overall structural integrity as best I can. The strip down process is tedious and sometimes grueling, pulling every nail, tack and staple from the frame. I want her fresh and ready so I do try to remove every last staple. It is during this process where I really get to know the chair. The curves of her back, lines of her legs, her beautiful time worn flaws. This time we spend quietly together is when she speaks to me. She tells me her secrets and stories of her past, and I whisper back to unveil her future. If this sounds like a lovers tale, that’s because it is. I have fallen in love with each chair I’ve worked on; but The Velvet Rebel? She was my first, so she’s extra special.


Why Stripping Matters
As I removed her worn, stained upholstery, I got down to the old, compressed foam. If you wonder why one might strip a chair all the way to the frame – it is because the vintage and antique pieces really do need all fresh interior materials. You won’t be surprised to learn that many pieces come with their own…individual…odor. Which is another reason my pieces will have all new interior materials. These fresh materials provide new life and longevity; and this is a big difference between just recovering a chair and reupholstering a chair.
When I’ve stripped a chair down, there is the ability to sometimes change the way the chair is reupholstered, one example is if there is a LOT of scratches and damage to the wood on the front of a seat, one may decide to cover that area with fabric so there is no bare wood showing around the seat of the chair. These determinations are made on the fly after all materials have been removed. Luckily, this chair didn’t require drastic repairs and I could move forward with the upholstery.


Vision Comes Into Focus
When I got The Velvet Rebel down to her bare frame, my vision for her makeover became clearer. I wanted a wild leopard print, velvet chair with a shock of unexpected turquoise. I also knew I needed to paint the frame. She had lots of scratches and scrapes that needed to be covered. In the photos below I have primed her so she would be ready when the fabric came for me to decide on what color to paint the frame! While I don’t have a photo of her draped before I painted, once I had laid the fabric across her bones I knew it had to be a flat black. I did not go for a glossy black, as I didn’t want it to compete with the velvet textures on this chair.


Design Decisions
After draping the fabrics on the chair in various forms – I had to make the decision of which fabric to put on the seat versus the backrest. I knew the faux crocodile vinyl would go on the back but would the seat be the leopard print or would the backrest look better in the print?


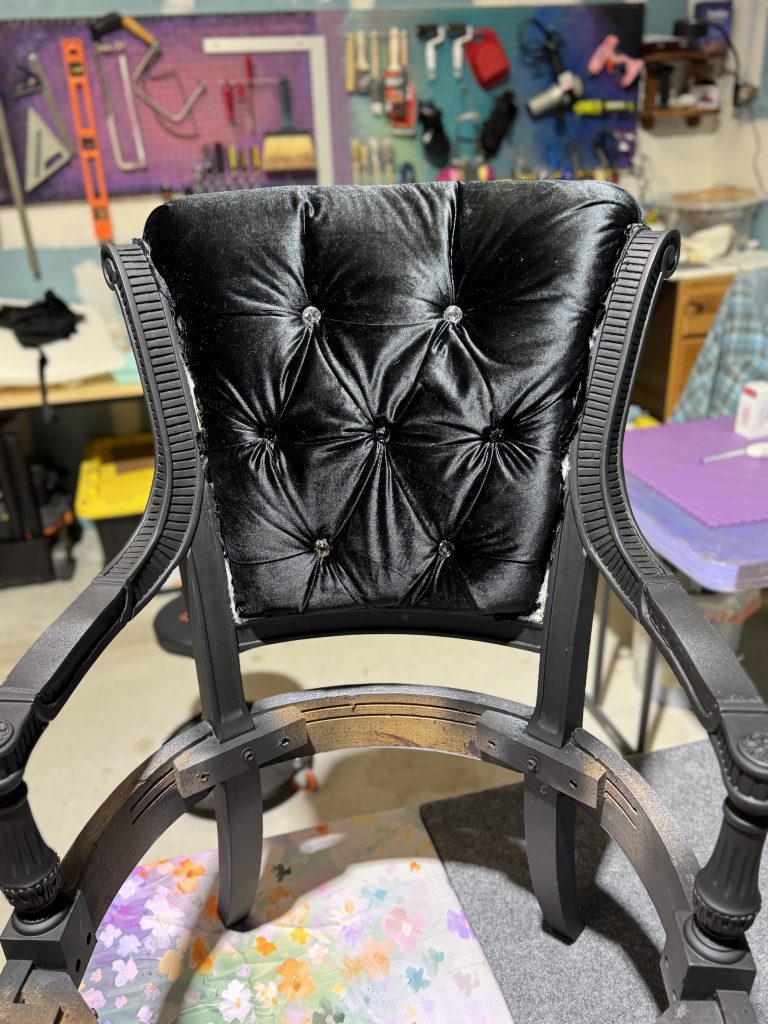
It was obvious once I laid out the fabrics which should go on the back versus the seat. It was then that I decided that The Velvet Rebel needed to be even more glamorous. This is when I decided she needed to have a tufted back rest with crystal buttons. The only thing was, I didn’t know how to tuft anything. Many hours of YouTube videos later, I was armed with knowledge to put into practice and I created my tufting template. I drew it out on paper, transferred it to the foam and cut out all my button holes. The tufting looked a lot easier on the video, but it could also be that velvet can be an unruly fabric to deal with. Still, I was pleased with the result and before I knew it, the front of the backrest was completed!


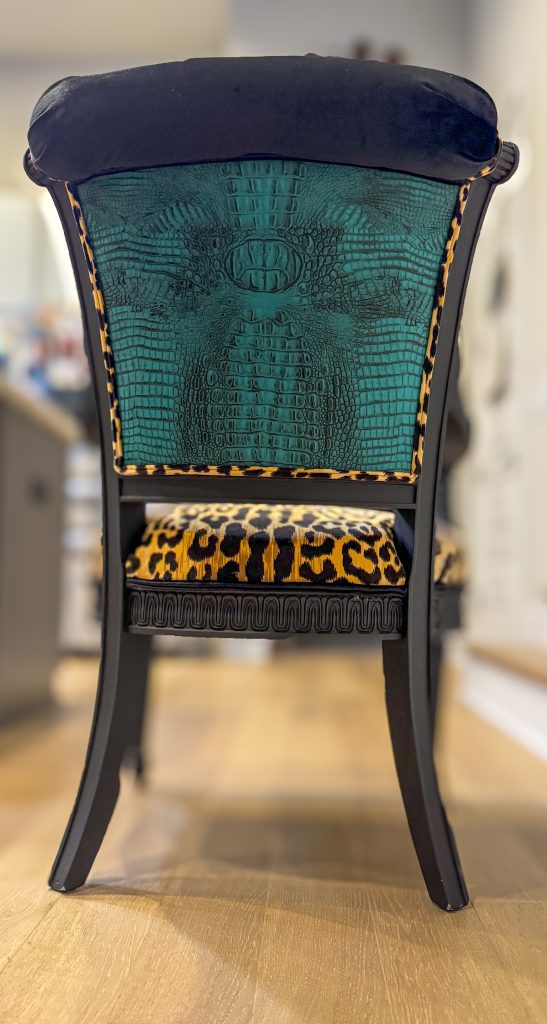
That Turquoise Touch
I moved on to the chair back where the pop of turquoise would come into play. It takes time to properly figure out fabric placement on some pieces. Luckily, The Velvet Rebel was pretty easy in that regard. I lined up the faux crocodile on the back and got it stapled into place. I wanted to ensure it was aligned properly and that the circular part of the pattern was in the upper half of the back. This allowed for the enough of the crocodile pattern below it to show its gentle curve giving the back view a lot of textural interest.


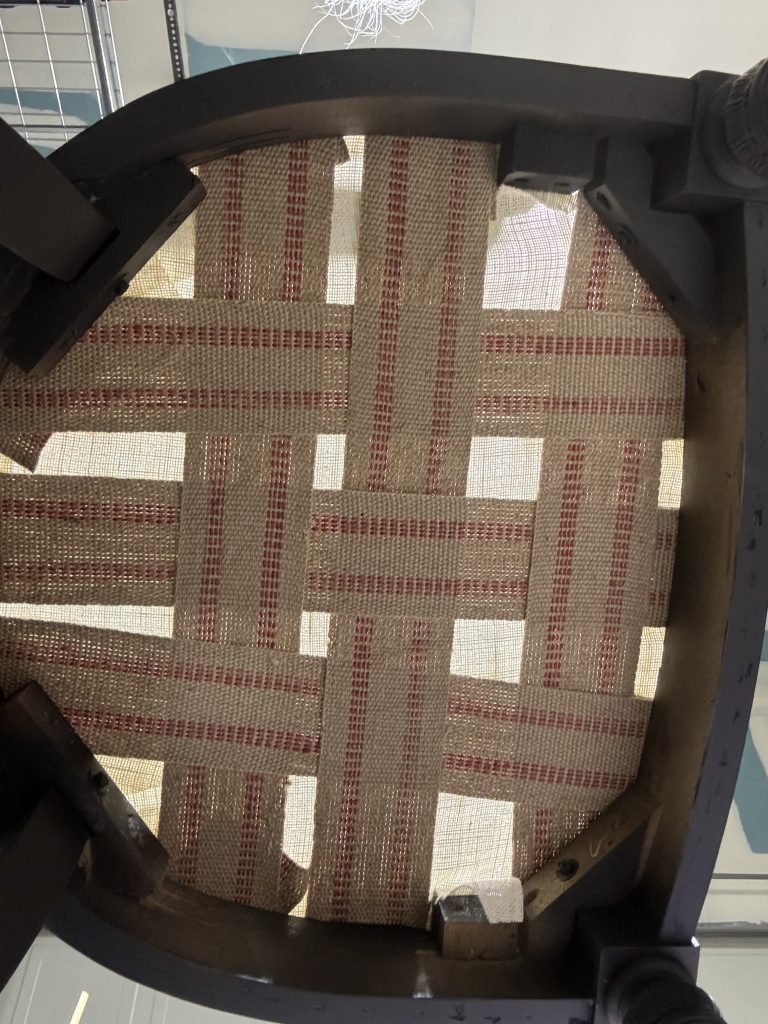
A Seat That Roars
With the top portion of the chair complete (all but the trim) I moved on to rebuild the seat. I wanted a nice, full seat that would be soft, yet sturdy. New webbing was applied and several layers of cotton were placed until the padding felt just right to my fingers. A fresh piece of foam was cut and a soft layer of cotton batting was stapled into place, making the seat ready to roar.


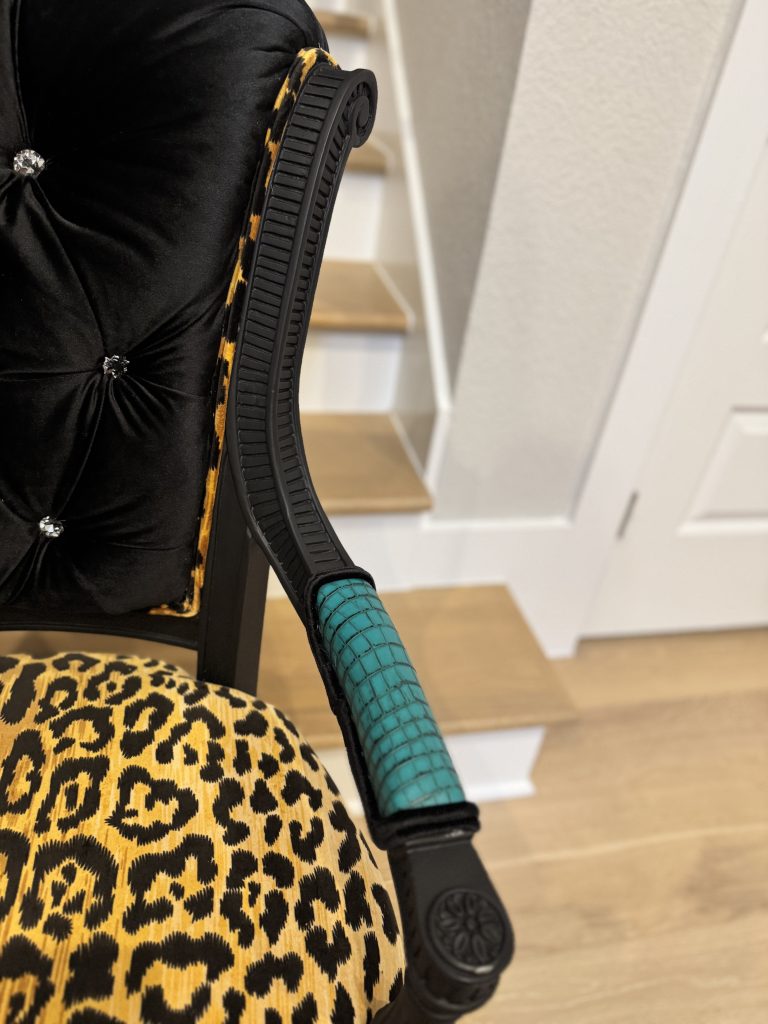
Arms with Attitude
At this point, I had one more decision to make to complete The Velvet Rebel’s transformation. What do I put on the arms? Black velvet? Leopard print? Either would have looked lovely – but it had to be to bring that splash of turquoise to the front of the chair. I laid out some fabric pieces before committing to the design to ensure I loved the idea. I let it seep into my brain overnight so I could stare at it from every angle and yup, that was the right direction to go. With that decision made, I carefully laid out the leopard print, ensuring the pattern was placed properly on the seat for maximum impact and stapled it into place.


Finishing Touches
I covered the arms with a soft layer of foam and Dacron and looked over the faux croc pattern to find just the right part of the design for the arms. I decided these horizontal lines made a nice contrast to the vertical line of the leopard print on the seat. Now the arms were complete and all that was left was to decide on trim.


The Final Flourish
For many of my chairs, I sew a double welt trim that matches or contrasts with the design of the chair. For The Velvet Rebel I knew it had to be leopard print trim around the entire top of the chair, beautifully framing the black tufted velvet and the embossed crocodile back. Black velvet trim outlined the seat and arms making a subtle outline without fighting the pattern or blending in.


The Velvet Rebel, Realized
After carefully attaching all the trim, she was complete, and boy did she have a lot to say!
The Velvet Rebel is a textural delight with her black velvet tufted back, glamorous crystal buttons, roaring soft leopard print seat, and turquoise faux crocodile embossed vinyl back and arms.


She Taught Me So Much
She taught me so much…About patience, about risk, about trusting the vision even when it’s buried under layers of dust and staples. This chair, once forgotten, became a fierce declaration of what’s possible when you create with soul. If you felt a spark reading this, maybe your own revival is waiting in the wings too.
I take on a select number of custom commissions – crafted with soul, edge, and elegance. Ready when you are!